Drawing A Deer Step By Step
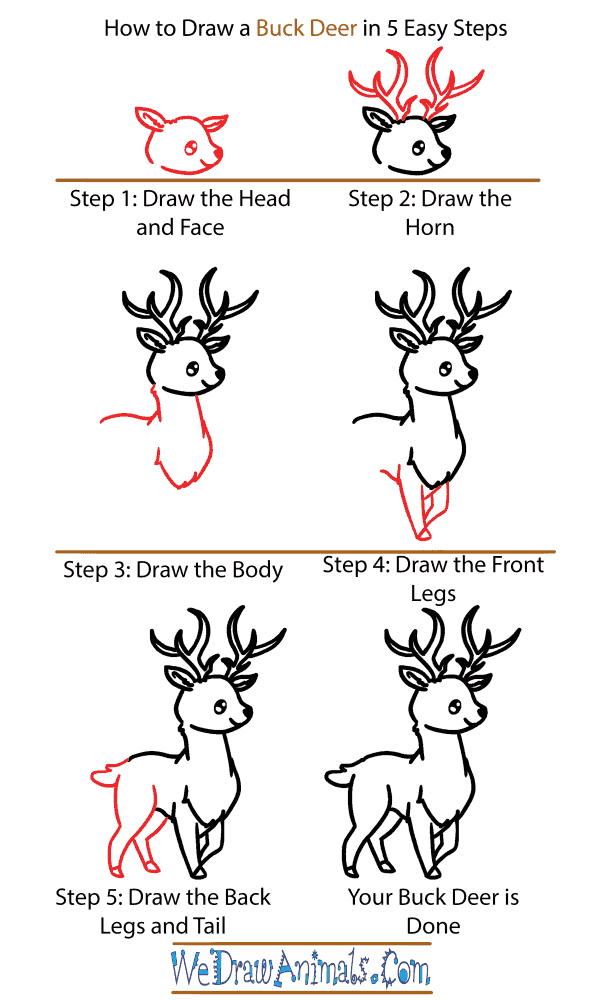
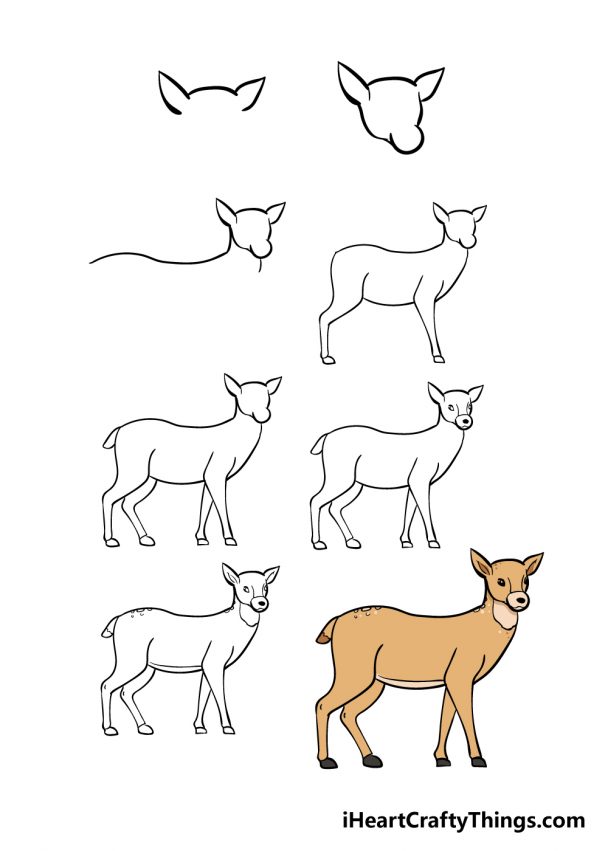
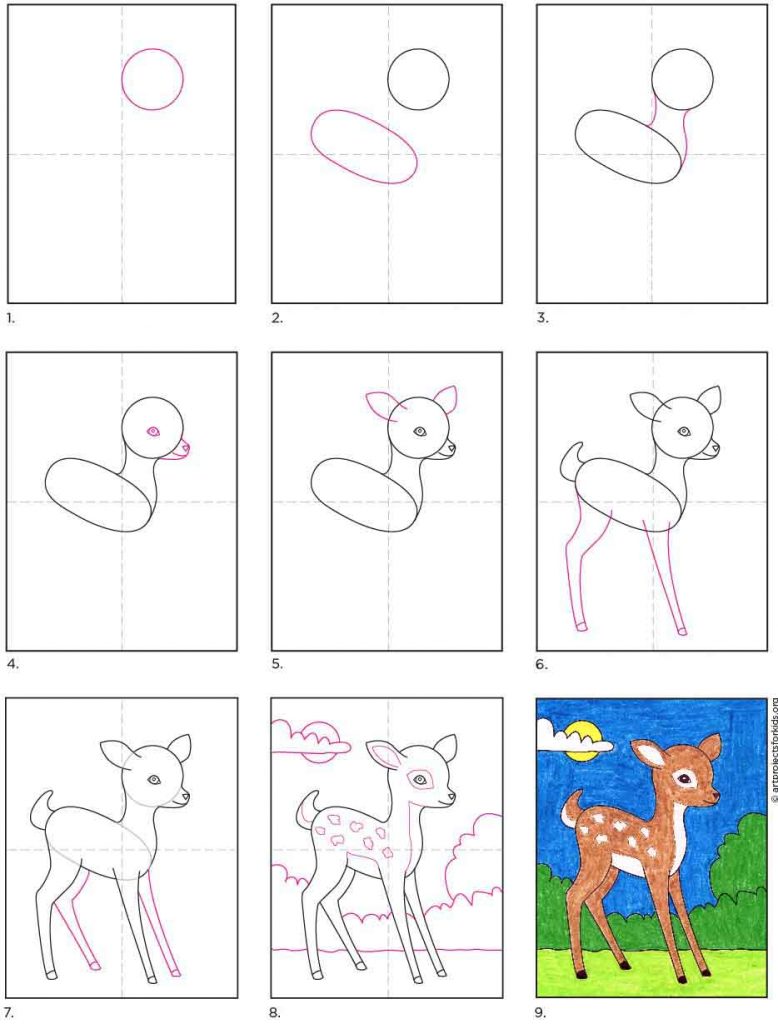
Drawing A Deer Step By Step - 8.1k views 4 years ago. Draw the neck and front legs. Hi everyone, in this video i show you how to draw a deer step by step 🦌. The second step in drawing a deer is to draw an elongated oval to represent the deer’s torso. Draw one antler on each side of the deer’s head. To represent this, draw an oval shape on the left side of the main body. Draw the front of the deer’s body. Web in this realistic deer drawing tutorial, i'll show you how to draw a deer step by step: You can support the author of this website and also suggest your own ideas for new drawings by making a small donation here: Follow my step by step drawing tutorial and make your own deer drawing. To represent this, draw an oval shape on the left side of the main body. Once you have completed this step, you can move on with the rest of the deer drawing tutorial. We will notice the shape and size of each part of the deer. Now you can draw the back end of the deer. Habib art & craft. Color the fur and antlers. To draw these in, you can simply use some curved lines with a point in them as they appear in the reference image. The third, slightly smaller circle, represents the head. Add the body to your realistic deer drawing. Draw the front of the deer’s body. Did you like the tutorial? Draw the face details, and add more to the huge rack of antlers. Draw the front of the deer’s body. You can support the author of this website and also suggest your own ideas for new drawings by making a small donation here: The second step in drawing a deer is to draw an elongated. Begin by drawing an oval shape to represent the head of the deer. From the sketch, torso, legs, and details of the head to a pair of beautiful antlers. Black marker (optional) how to draw a deer printable pdf (see bottom of lesson) in this article, we will begin with a new piece of paper and learn how to draw. On either side of that blocky heart shape, create a leaf shape, one thinner than the other. From the sketch, torso, legs, and details of the head to a pair of beautiful antlers. Draw the face details, and add more to the huge rack of antlers. To represent this, draw an oval shape on the left side of the main. This may be a difficult part of the drawing, but it’s quite simple if you take your time. Lastly, add two short lines. Construct the legs by creating a linear structure. Follow my step by step drawing tutorial and make your own deer drawing. How to draw a deer step by step easy. Did you like the tutorial? Add the body to your realistic deer drawing. Draw the front of the deer’s body. 218 views 4 months ago. Now, try to outline the eggplant placing it in our drawing grid using our dashed lines as guides. You can support the author of this website and also suggest your own ideas for new drawings by making a small donation here: In this short drawing video, we'll guide you through the process of creating a. Now, try to outline the eggplant placing it in our drawing grid using our dashed lines as guides. Draw the head on your. This should slightly overlap the body as well. Habib art & craft studio. From the sketch, torso, legs, and details of the head to a pair of beautiful antlers. Follow my step by step drawing tutorial and make your own deer drawing. No views 1 minute ago #deerdrawing #drawingforbeginners #stepbystepdrawing. Draw the front of the deer’s body. On either side of that blocky heart shape, create a leaf shape, one thinner than the other. Did you like the tutorial? How to draw a deer step by step | simple deer drawing unleash your artistic side with. Draw the neck and front legs. Sketch in a buck deer’s antlers. Hi everyone, in this video i show you how to draw a deer step by step 🦌. Add details to the background. Add an ear on each side of the deer’s head. How to draw a deer step by step easy. Draw the body of your deer sketch. 8.1k views 4 years ago. The third, slightly smaller circle, represents the head. We will notice the shape and size of each part of the deer. Create a blocky heart shape. To draw these in, you can simply use some curved lines with a point in them as they appear in the reference image. Two of these circles are of the same size and represent the front and rear limbs and the deer’s body. Shade an inverted, curved triangle for the nose, then use curved lines for the snout and top of the head. To represent this, draw an oval shape on the left side of the main body. This realistic deer drawing can also serve as an inspiration or as a base if you're looking for deer logo designs. Begin the deer outline by sketching the animal's face.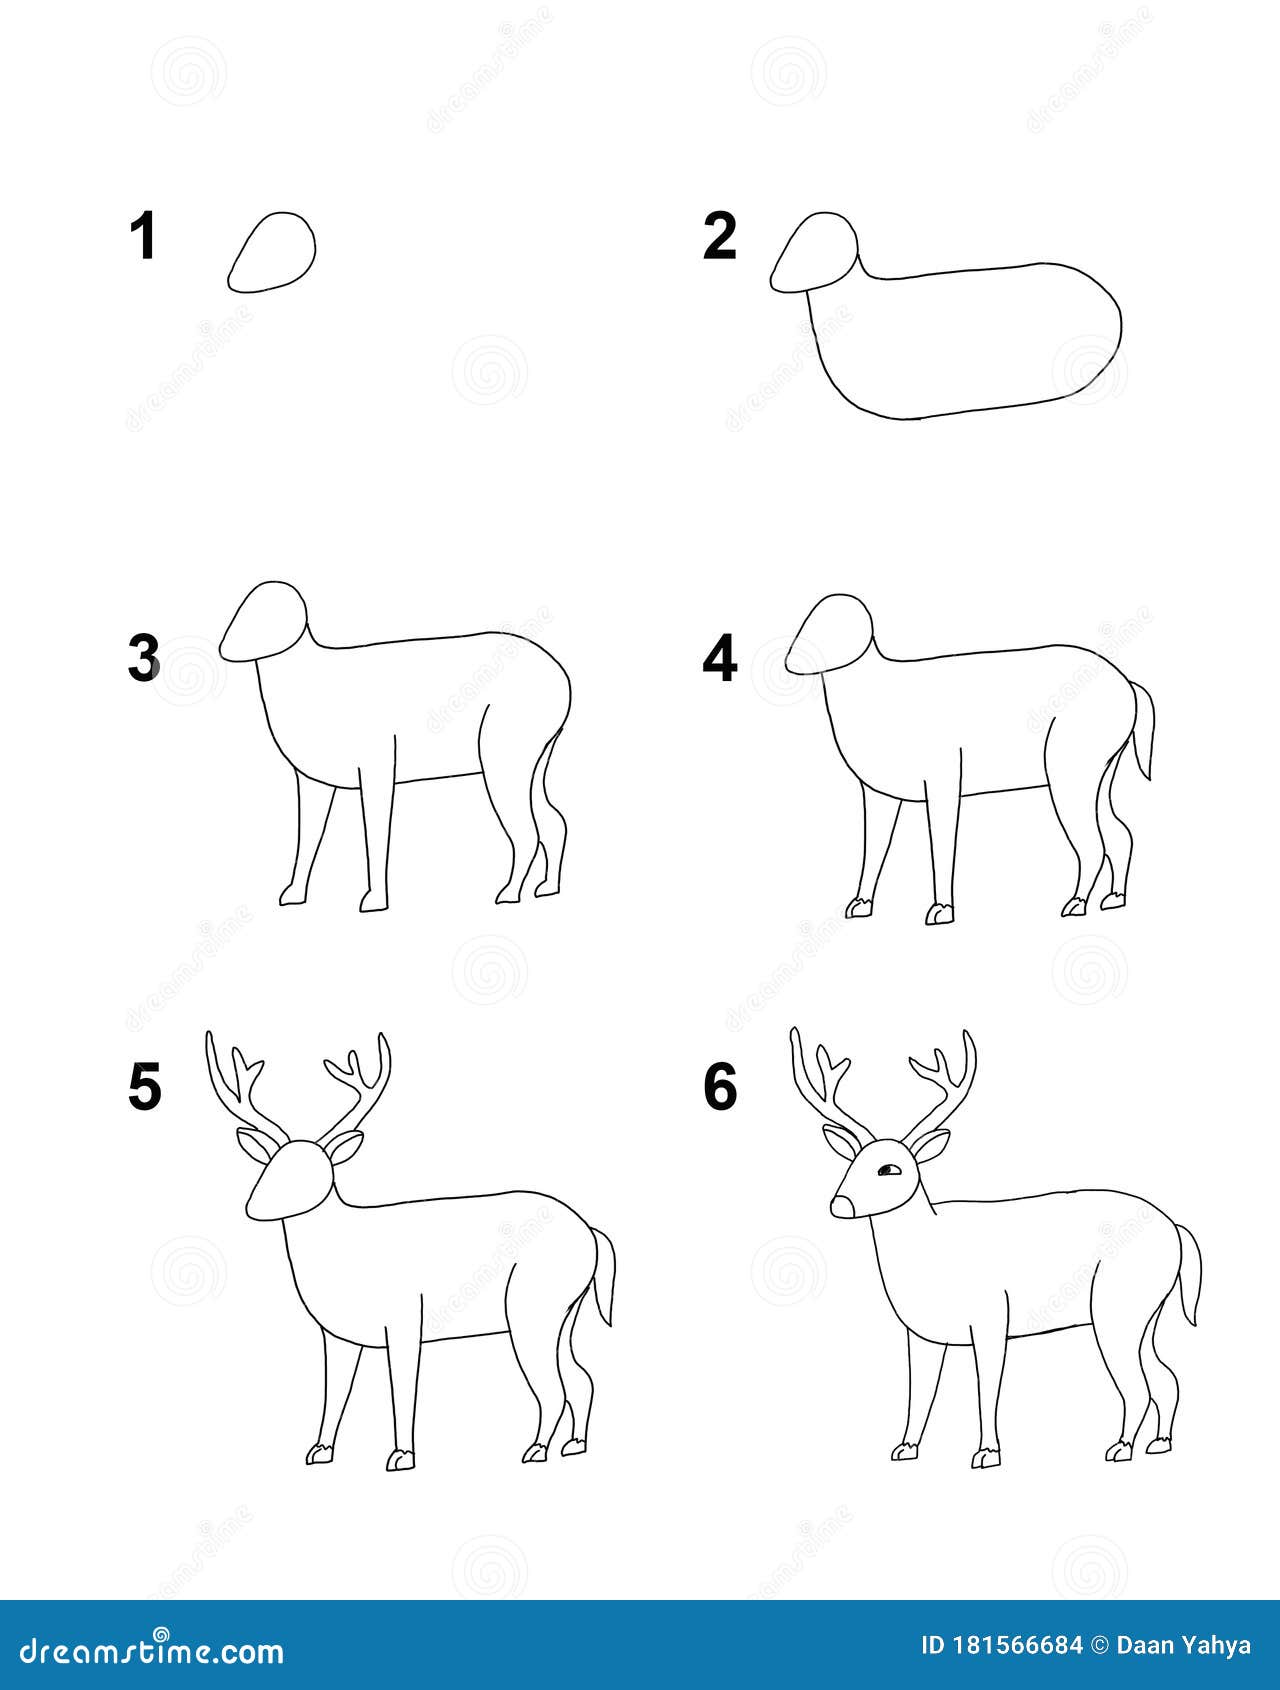
How To Draw Deer Step by Step Cartoon Illustration with White

How to Draw a Deer Step by Step for Beginners

How To Draw Deer Step By Step Images
How To Draw A Deer Step By Step For Kids

How to Draw a Baby Deer Really Easy Drawing Tutorial

How to Draw a Deer in a Few Easy Steps Easy Drawing Guides
Deer Drawing How To Draw A Deer Step By Step!
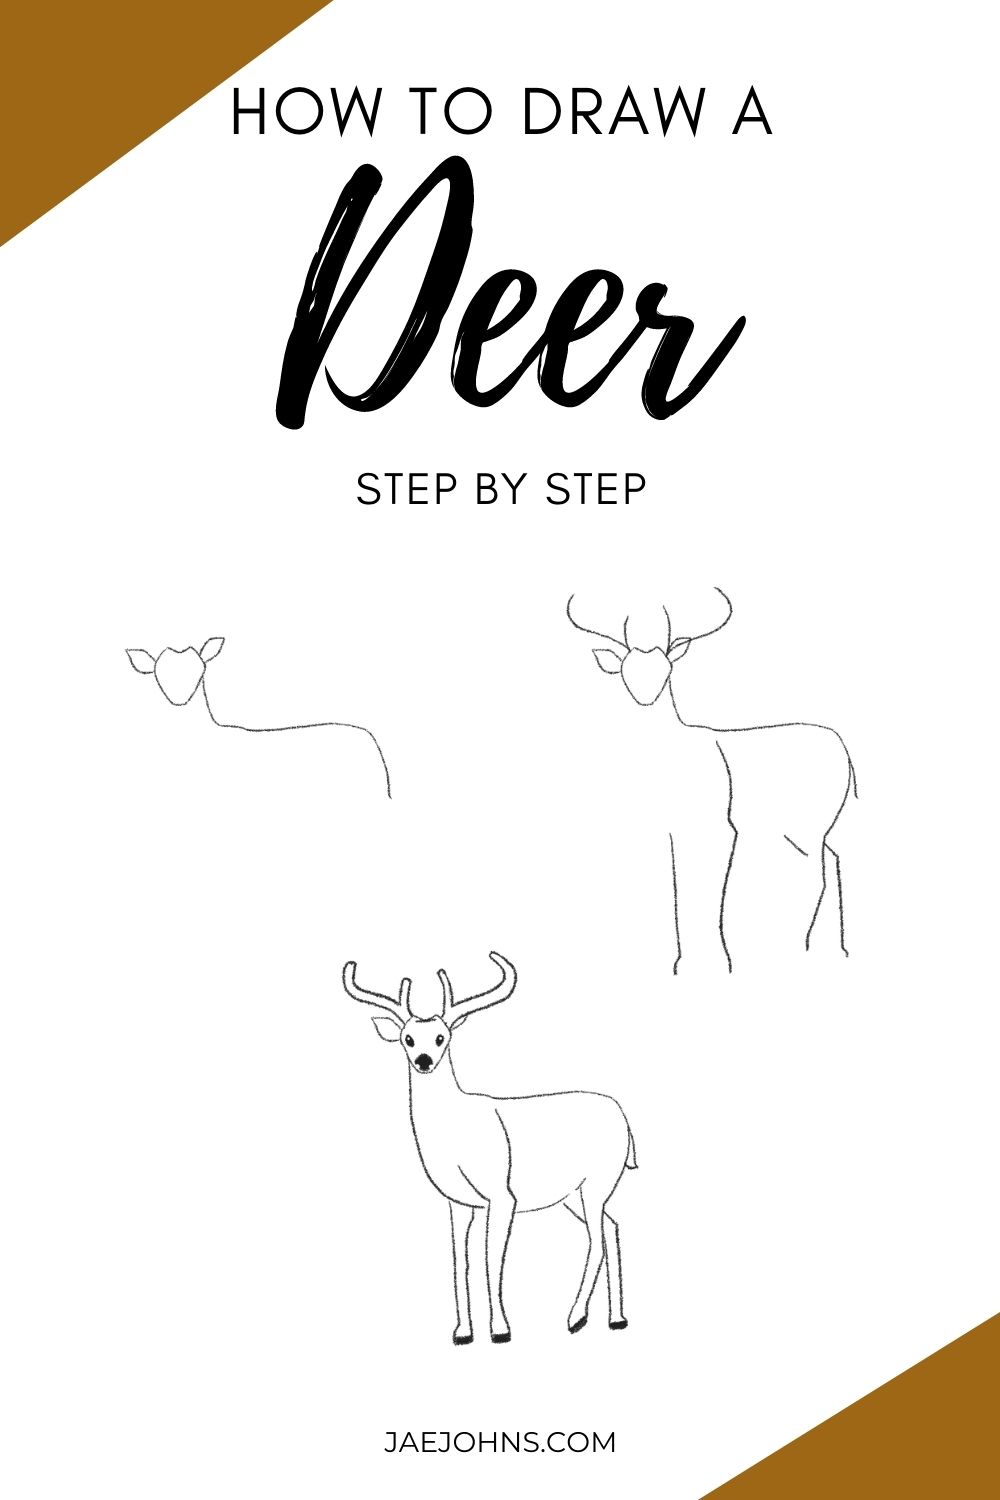
How to Draw a Deer (Easy Step by Step with Pictures) Jae Johns

Drawing a deer in 10 steps easy tutorial Deer drawing, Deer drawing
Easy How to Draw a Deer Tutorial and Deer Coloring Page
How To Draw A Deer Step By Step | Simple Deer Drawing Unleash Your Artistic Side With.
This May Be A Difficult Part Of The Drawing, But It’s Quite Simple If You Take Your Time.
The Base Of The Neck Should Not Be Above The Horizontal Line #3.
Deer Drawing Easy, So Where To Start.
Related Post: