Diy Marquee Letters Template
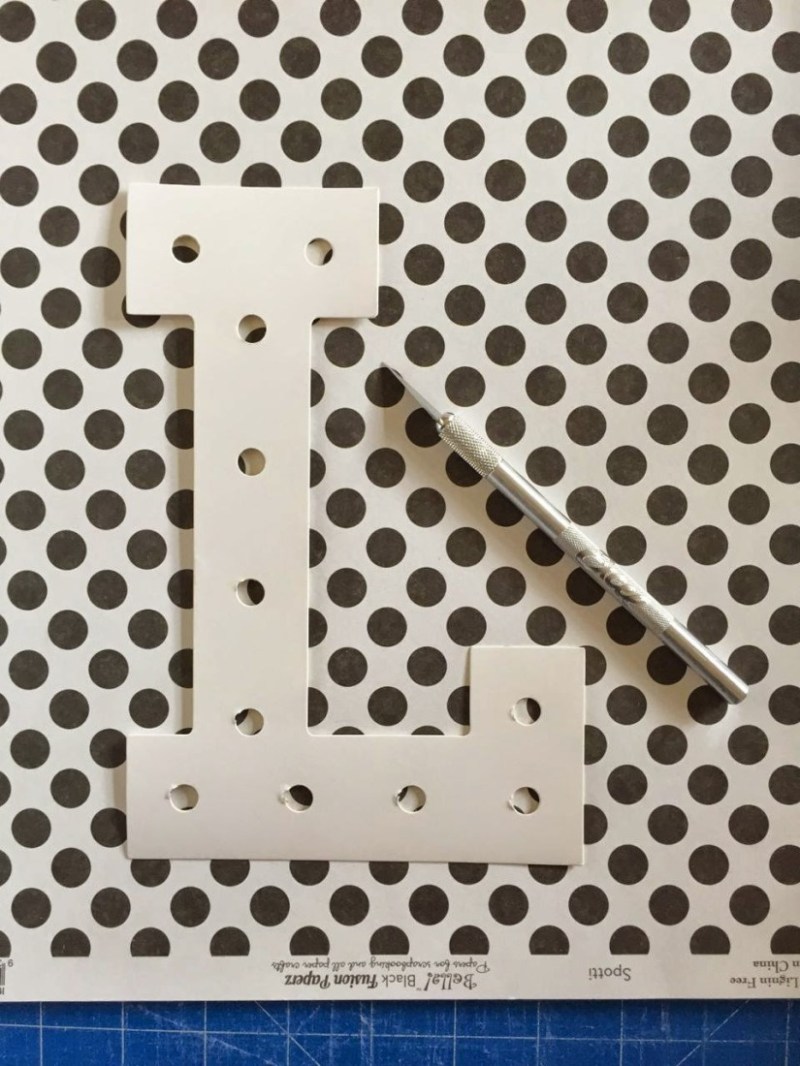
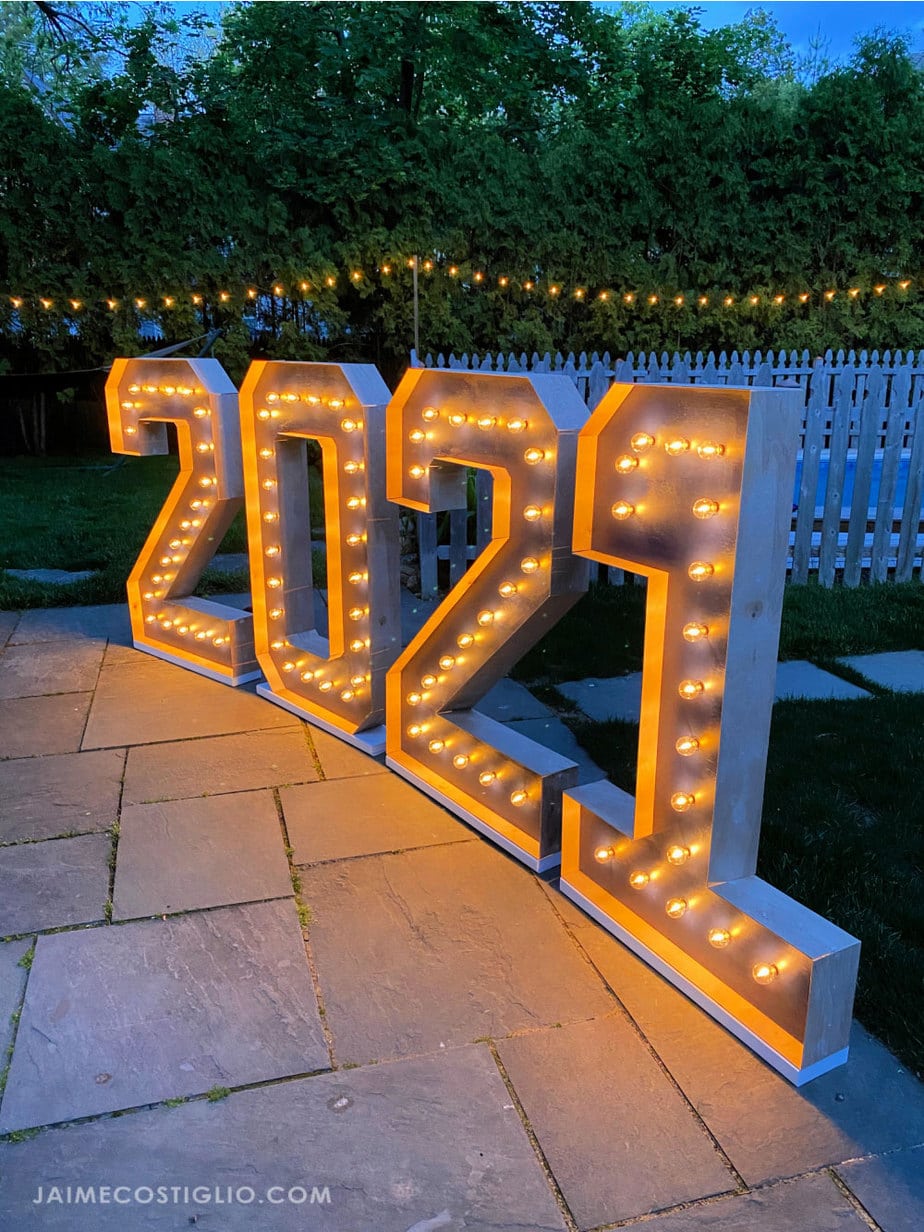
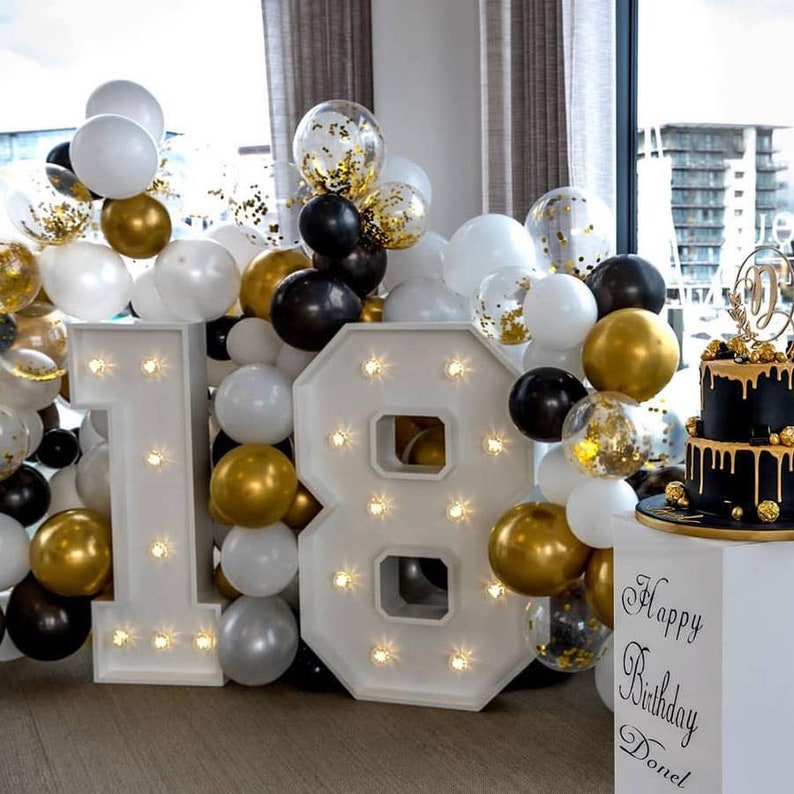
Diy Marquee Letters Template - Place the stencil on top of a piece of foam core board and trace it using a pencil. Use the pencil to trace the template in reverse on the back side of a piece of patterned paper. Web here’s the template: Make a statement with large marquee letters using my tutorial here. A diy tutorial to build giant marquee letters. Web check out this guide to build giant white light up marquee letters from foam board at home! You can glitter or mod podge any kind of paper material you prefer. The y you have a to scale template that you can trace or. Take advantage of any straight edges by lining the stencil up with the edge of the foam core board. Measure for light bulb placement. This step begins in the video at 0:52. For the letters you have two options: Web place a pencil in either the 10″ or 18″ hole and mark a half circle, change to the other hole and mark another half circle. Those are great, but what if you want something larger and more amazing than your standard 18 inches? Web. Web assemble oversized marquee letter templates. The letters come with a template that you can use to trace your cardstock. Web line up the front of your letter or shape 2 inches back from the edge of the flashing. In this tutorial, i’ll show you how i created my diy marquee letters to use as wedding decor. Cut out your. Once printed, lay out the pieces on the floor and arrange them to form the complete number. Count out how many lights are on the string lights. You’ll want to measure your letter and count your bulbs to determine where each one will be placed. Web we built our first set of these diy marquee letters for our wedding, and. A diy tutorial to build giant marquee letters. Those are great, but what if you want something larger and more amazing than your standard 18 inches? Use the pencil to trace the template in reverse on the back side of a piece of patterned paper. (they font i used can be found for free download here) i made the j. Now you need to create your text template to trace out onto your cardboard. (they font i used can be found for free download here) i made the j to be about 22″ tall, and the other letters are about 12″ tall. Web follow this tutorial to make your own diy marquee letters as signs for your wedding decor! Place. In this case, we were using 2′ x 4′ wooden boards, so we wanted 2′ high letters. Change the screw to the other compass location and repeat. First i created the text i wanted in the size and font i wanted in photoshop. Today i’ll show you how to make giant marquee letters because it’s easier than you think! Those. The letters come with a template that you can use to trace your cardstock. Bits including spade and standard drill bits. Make a statement with large marquee letters using my tutorial here. (they font i used can be found for free download here) i made the j to be about 22″ tall, and the other letters are about 12″ tall.. Web download the svg file here or the studio3 file here. Determine where you want each light to go on your letters, and draw a small dot for each bulb. The letters come with a template that you can use to trace your cardstock. A diy tutorial to build giant marquee letters. Now you need to create your text template. This step begins in the video at 0:52. You’ll want to measure your letter and count your bulbs to determine where each one will be placed. 28k views 2 years ago. The rest of the letters are covered with scrapbook paper from the same line. Once printed, lay out the pieces on the floor and arrange them to form the. You can use printable transparency sheets and add the words via the print and cut settings. Make a statement with large marquee letters using my tutorial here. The y you have a to scale template that you can trace or. When all edges are stapled, crease the corners. Most of the diy versions are made from chipboard 3d letters from. Most of the diy versions are made from chipboard 3d letters from the craft store. These templates should be printed in a puzzle format for easy printing and accurate sizing. You print it and lay out all of the sheets in order. Now you need to create your text template to trace out onto your cardboard. In this tutorial, i’ll show you how i created my diy marquee letters to use as wedding decor. You can glitter or mod podge any kind of paper material you prefer. Trace the template on foam board. Web check out this guide to build giant white light up marquee letters from foam board at home! (they font i used can be found for free download here) i made the j to be about 22″ tall, and the other letters are about 12″ tall. Web line up the front of your letter or shape 2 inches back from the edge of the flashing. Open up the box for your letter, and carefully remove the tracing template tucked into the back of the letter. Web follow this tutorial to make your own diy marquee letters as signs for your wedding decor! Learn how to make wooden light. Web marquee letters are quite the rage right now. When all edges are stapled, crease the corners. This lets you use full color designs and letters which is awesome.
Diy Marquee Letters Template
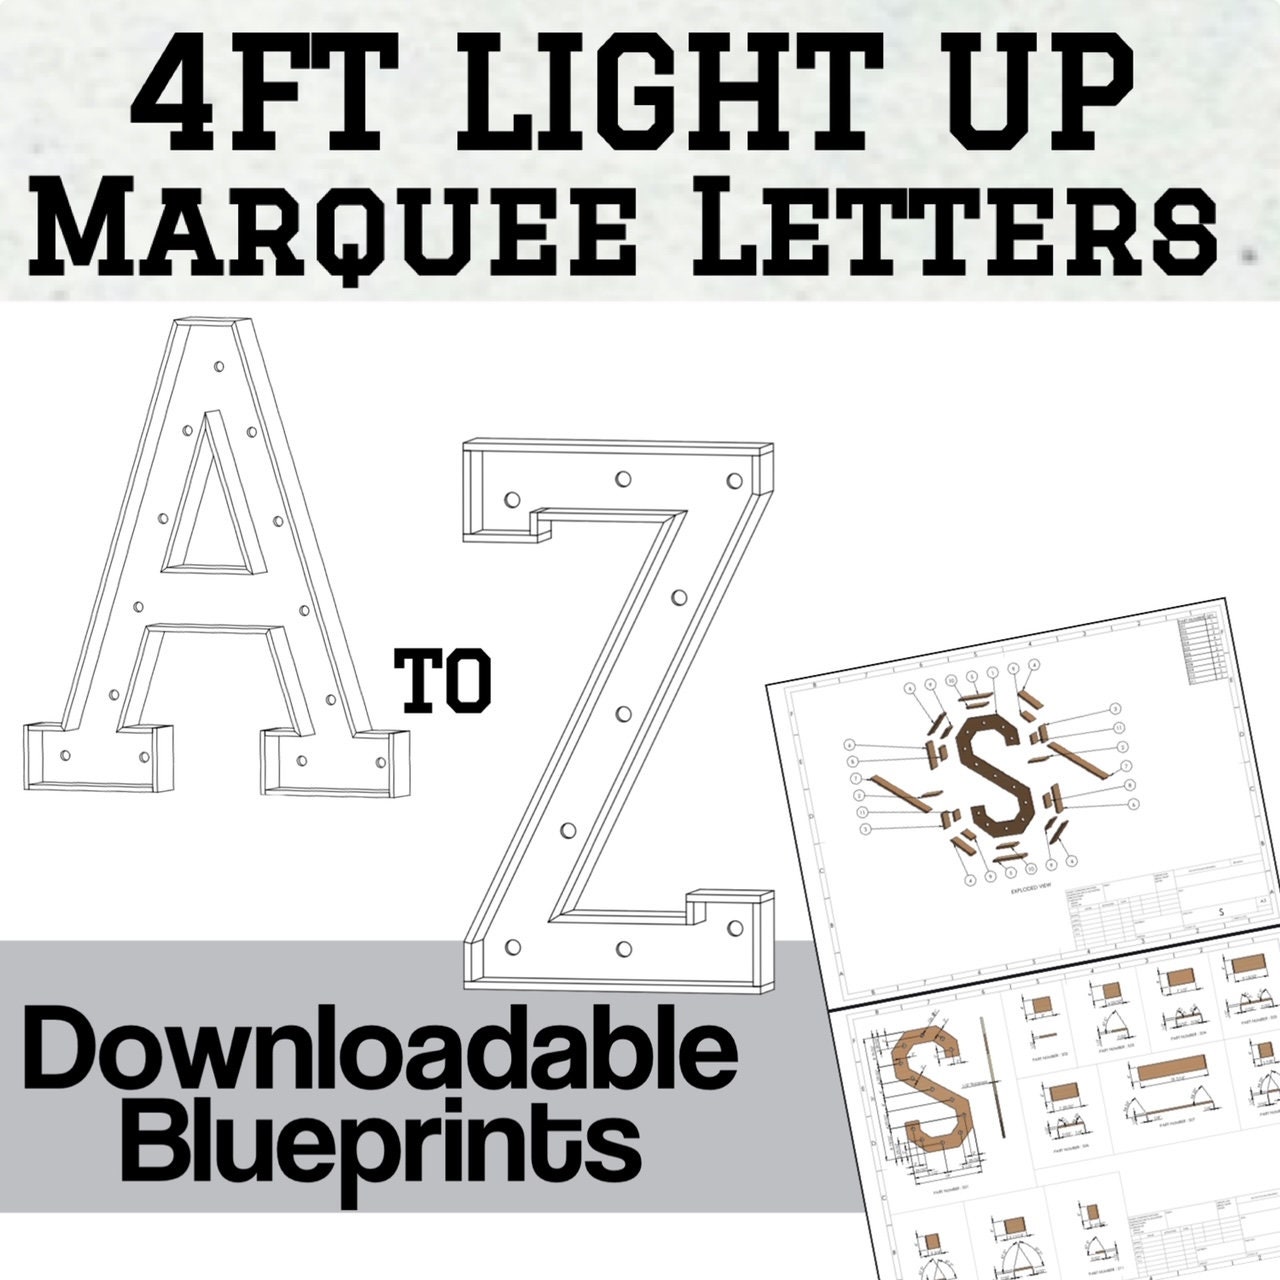
4Ft Marquee Letter Template
Diy Marquee Letters Template Caipm
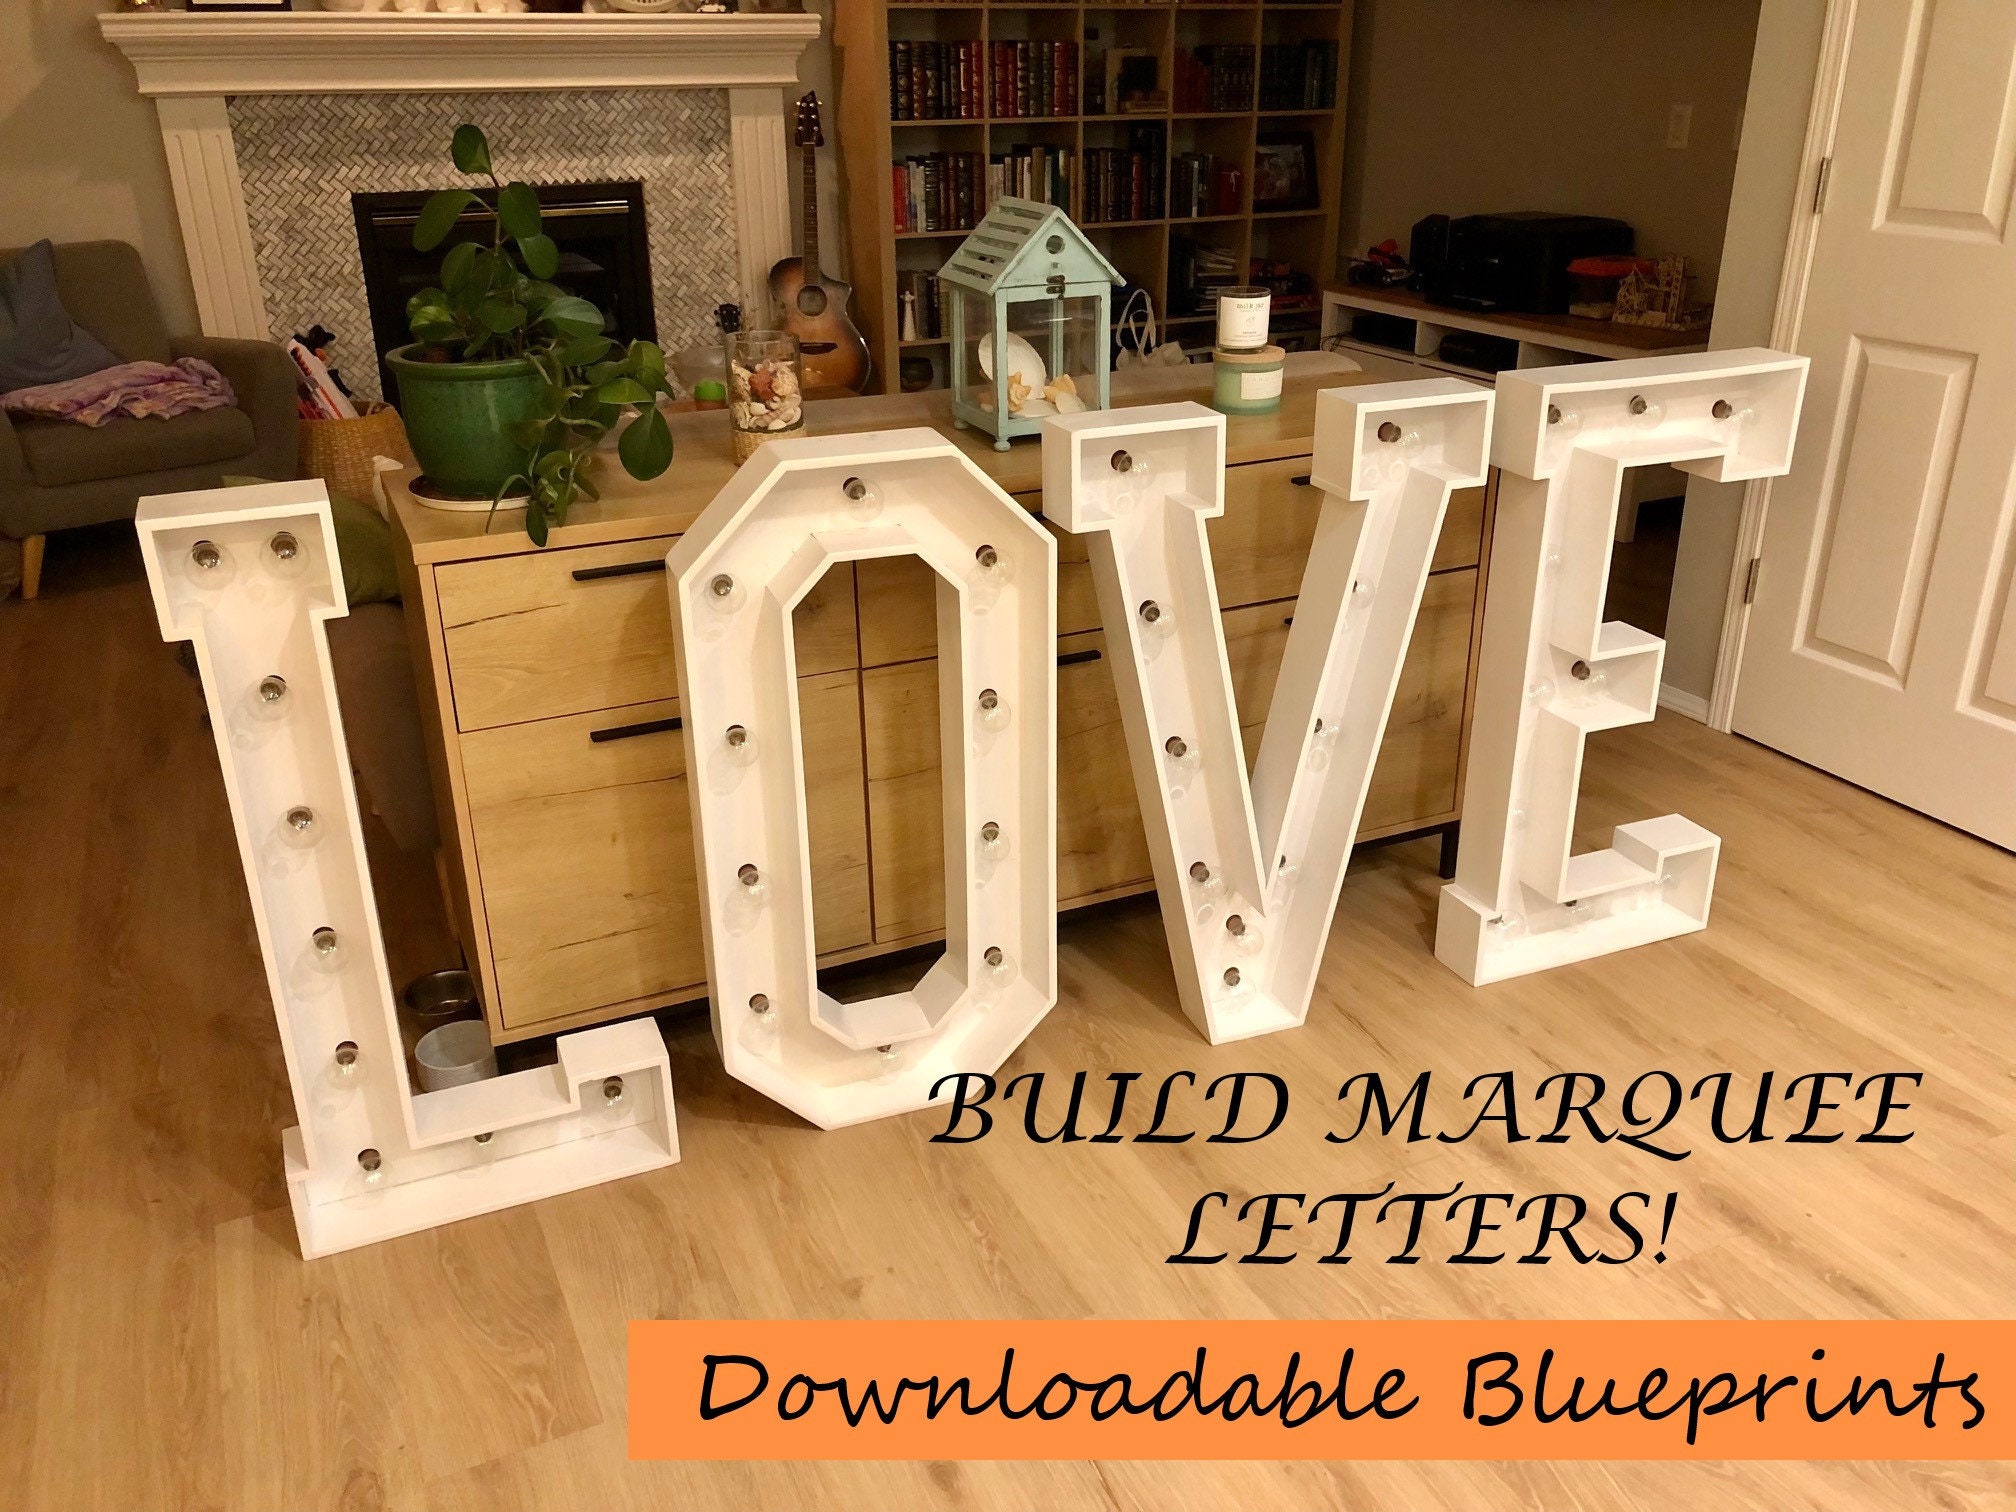
4ft DIY Marquee Love Letter Plans Professional Blueprints Etsy Ireland
DIY Marquee Numbers Jaime Costiglio
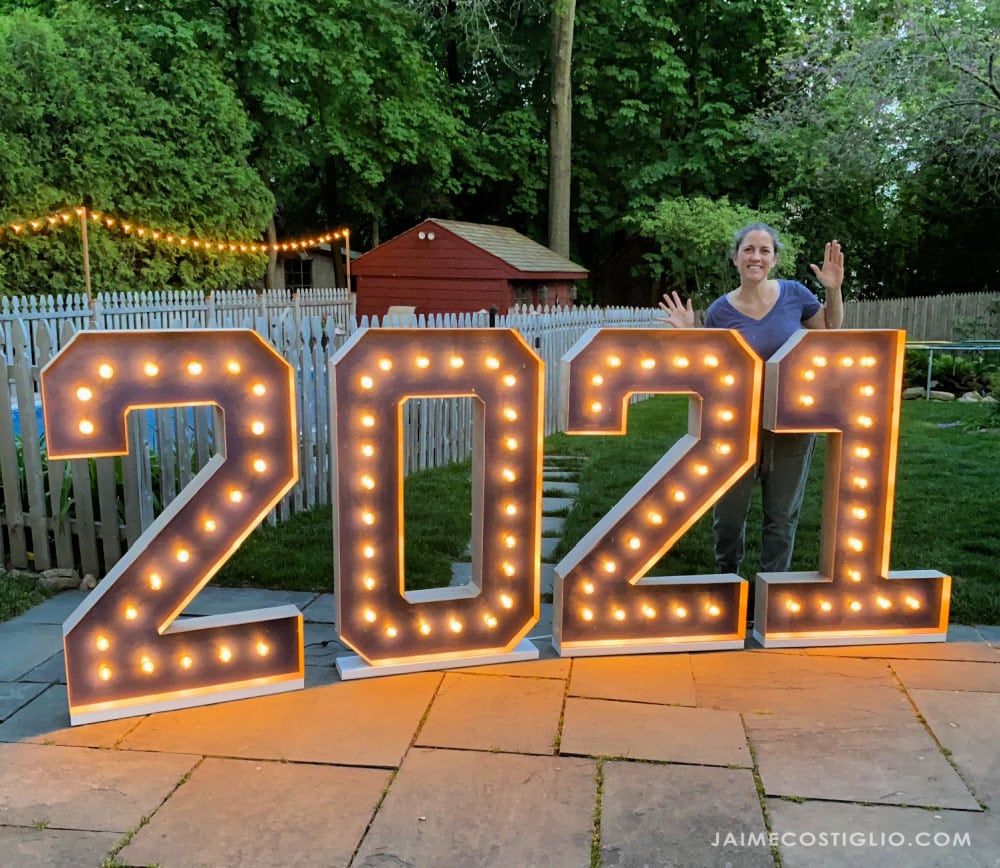
DIY Marquee Numbers Jaime Costiglio
4Ft Marquee Numbers Template Free

DIY Marquee Letters How Does She

Diy Marquee Letters Template How to Make a Marquee Letter DIY Lite

SO CUTE!! This tutorial has 2 versions for DIY Marquee Letters Metal
This Step Begins In The Video At 0:52.
All You Have To Do Is Take The Saved File To Staples, And Tell Them How Large You Need The Image Printed.
Mark Your Next Bend And Repeat This Process Until The Perimeter Is Completely Stapled.
Trace The Chosen Letters Onto A Piece Of Plywood.
Related Post: