Easy Step By Step Drawing Of A Rose
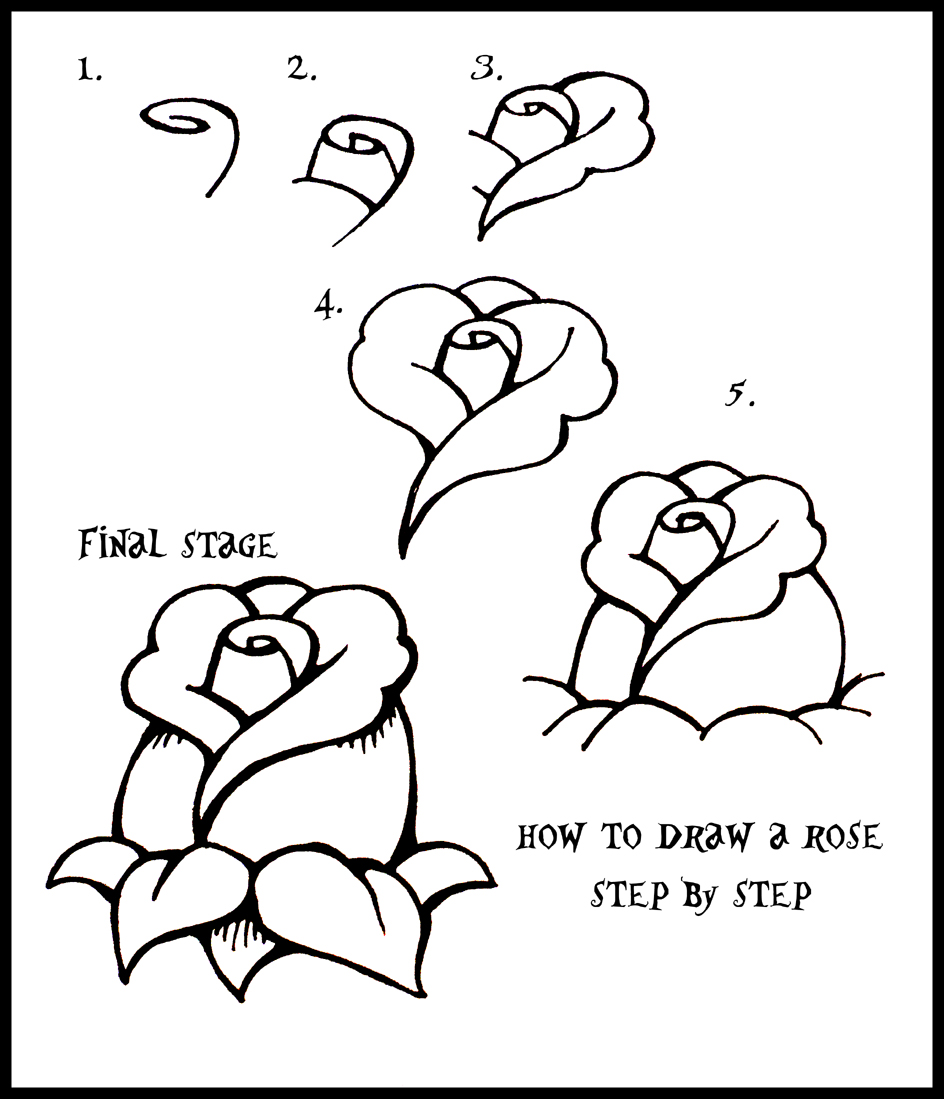
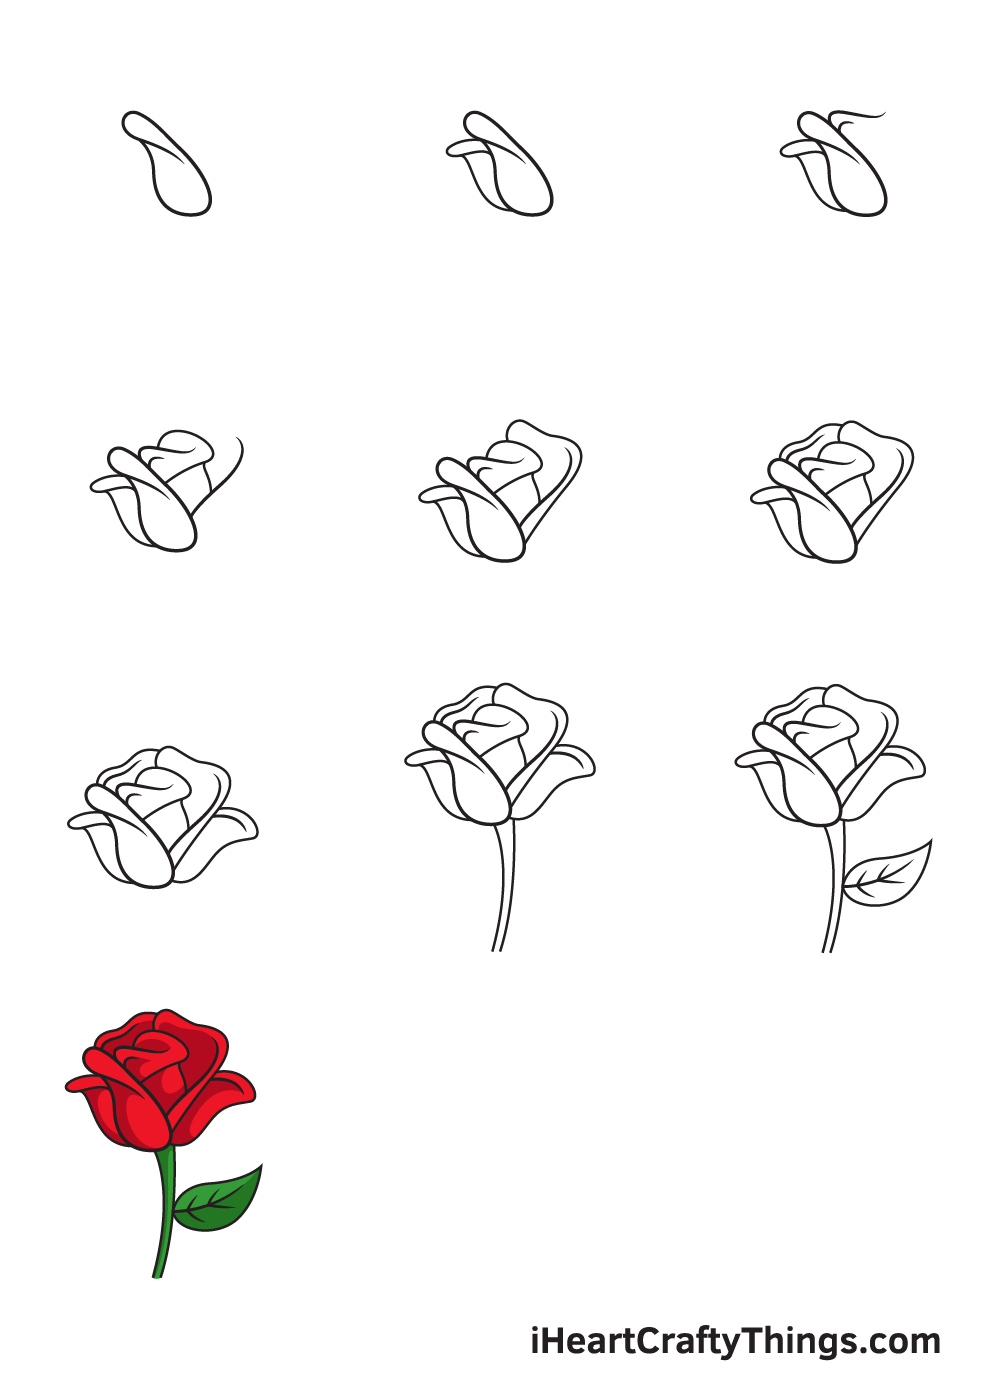
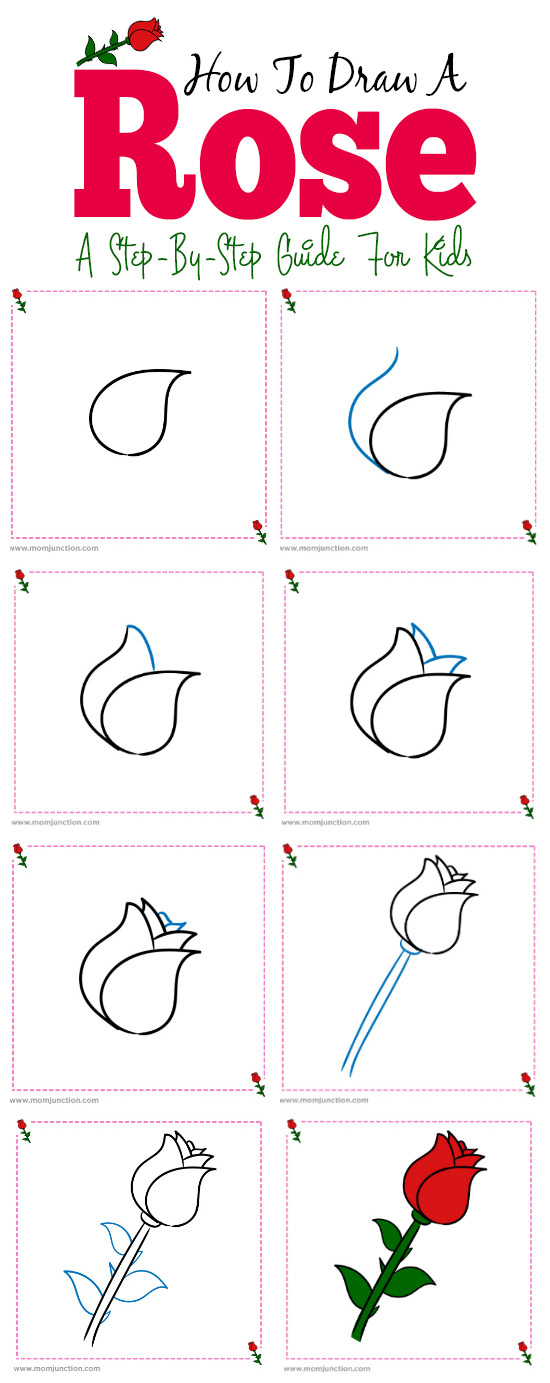
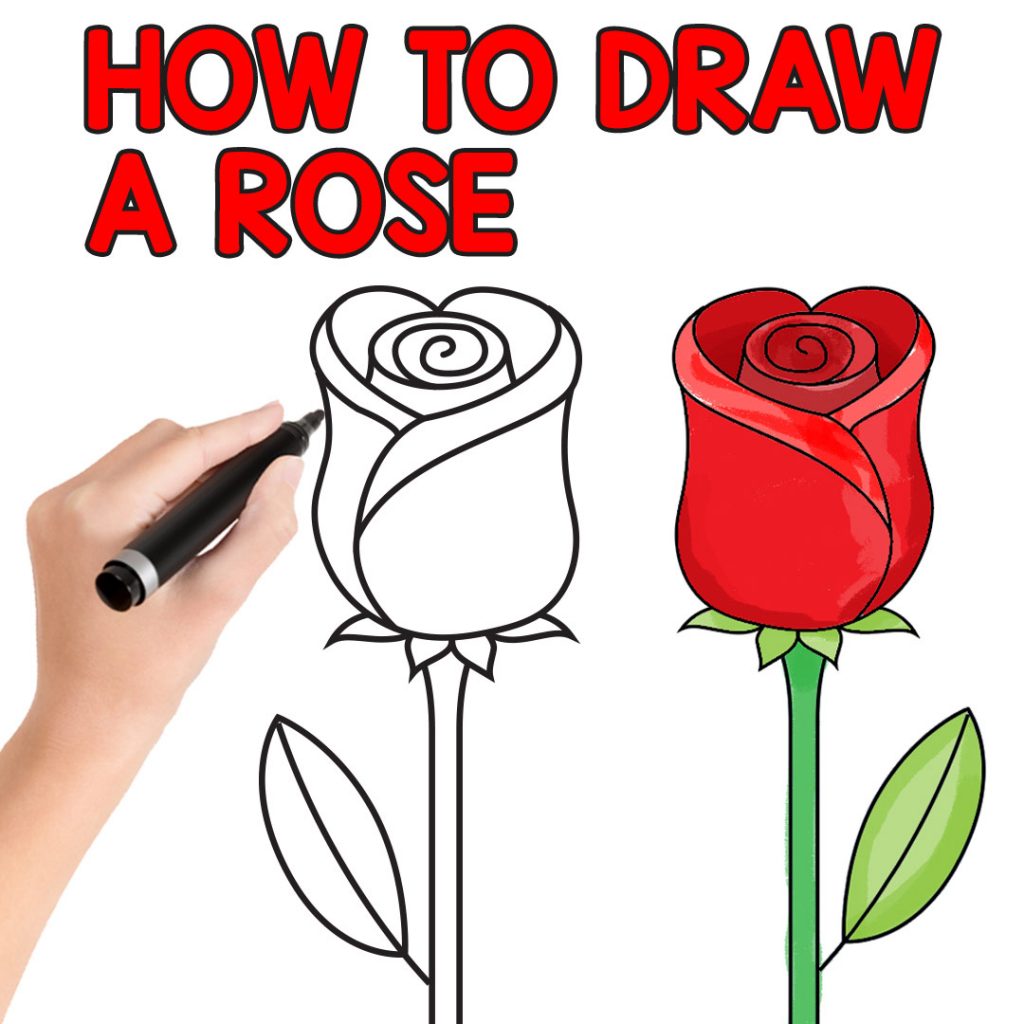
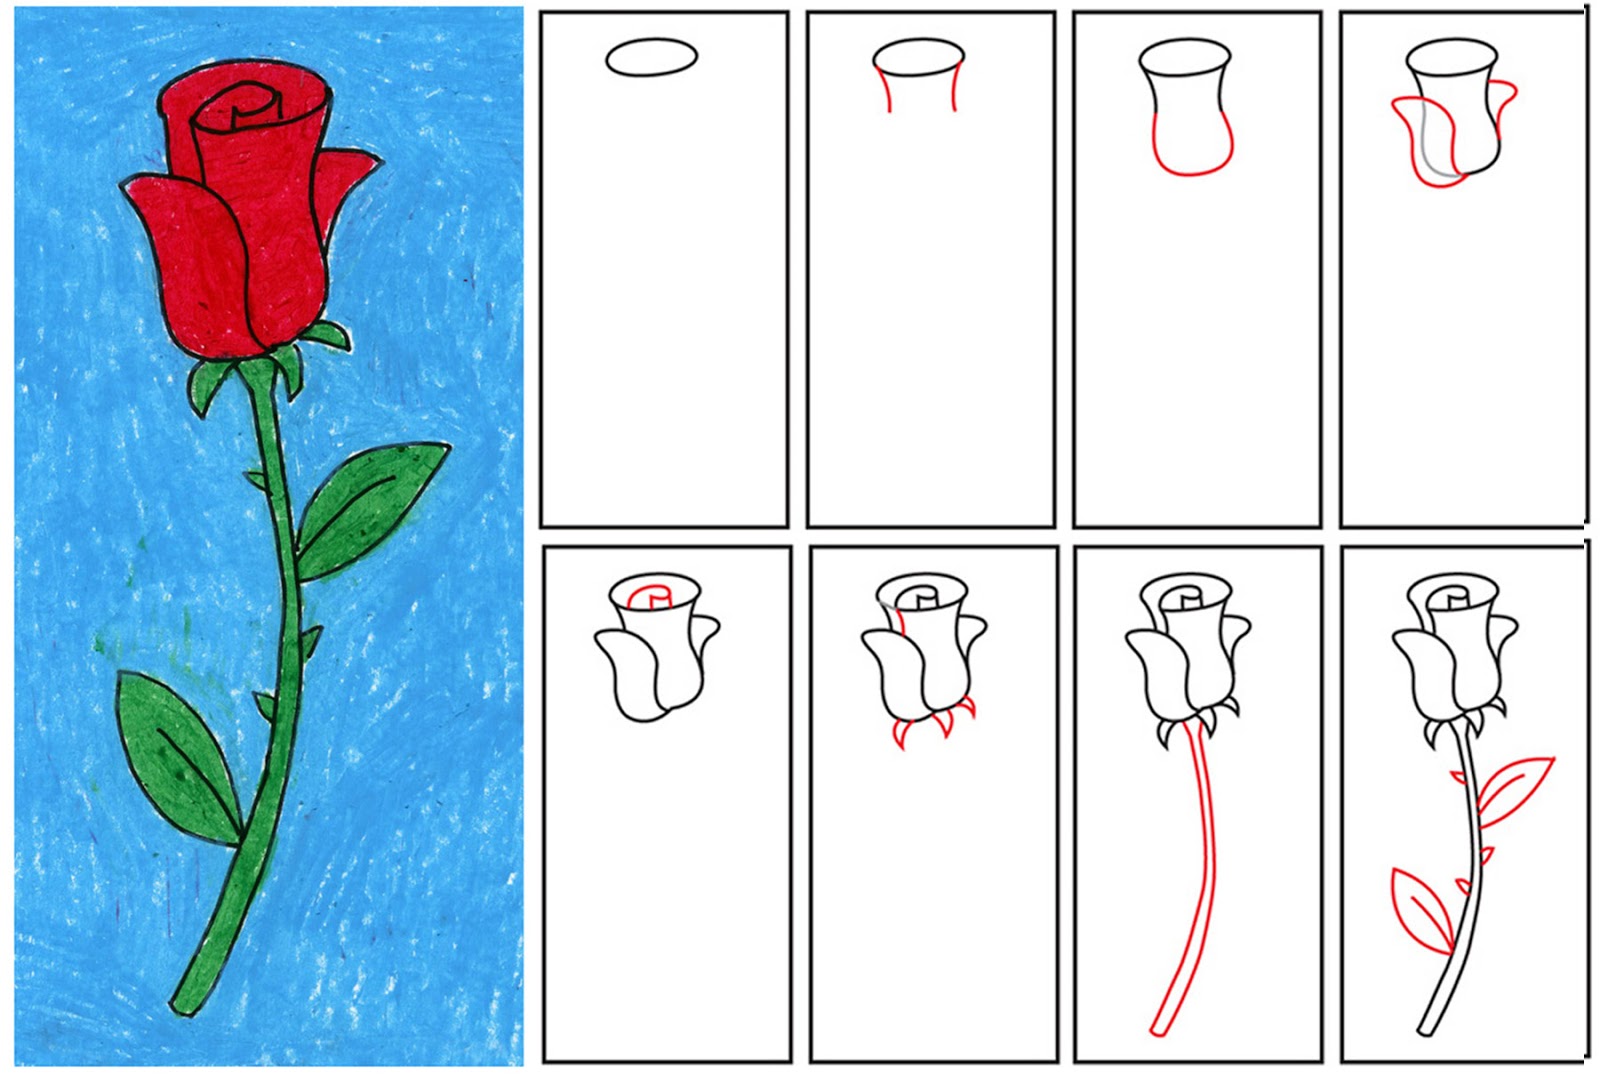
Easy Step By Step Drawing Of A Rose - With this how to draw a rose step by step tutorial makes. Draw the opening of this shape. This will be the inner bud of the rose sketch. Web the first step to drawing anything is research. From the first mark to the last, this is your complete guide to how to draw this favorite flower from painter and art instructor gigi chen. Make sure to keep them spaced evenly apart and gradually taper off towards the ends. It can be very helpful for anyone looking to learn how to draw a realistic looking rose. Don’t get caught up in how you think the rose should look on your paper. Roses are beautiful, but they can be a little intimidating to draw. This forms the basic outline of the rosebud. Drawing the first rose petal. This will be the inner bud of the rose sketch. This should form the center of the flower and will act as an anchor for all other petals. Next, draw a line that looks sort of like half of a curly s shape. We then add just three extra lines to create the illusion of. Draw several curving lines that radiate outward in all directions. This will be the inner bud of the rose sketch. Next, draw a curvy y shaped line in the middle of the u. this outlines the edges of the rose's overlapping petals. Begin the realistic rose flower outline by sketching the rosebud center of the flower. This should form the. Join a curved line from the small circle to the oval shape for the second petal. 🌹 💚 for drawing online videos visit my. ️ supplies you might love (amazon affiliate links):. Web starting from the bottom of your basic shape, draw a couple of lines that will start to form your flower. It’s very easy to do using simple. Follow the instructions below to create your own beautiful rose. With just a few simple shapes and strokes, you will be drawing dozens of roses in no time. This how to draw a rose step by step tutorial makes drawing this beautiful flower super easy, making it perfect for beginners as well as kids. Inside the circle, draw a spiral.. Rose drawing easy step by step tutorial/ rose pencil sketch lesson. From the center, draw curved lines to create petals. Just keep in mind that your petal will probably look very different from mine as all roses are different! Discover the complete process, as you draw petal after petal with graphite pencil and colored pencil. Then draw the form of. 7.9m views 7 years ago. Rose drawing easy step by step tutorial/ rose pencil sketch lesson. Your lines should look like a curved y. Follow the instructions below to create your own beautiful rose. Next, draw a curvy y shaped line in the middle of the u. this outlines the edges of the rose's overlapping petals. Stylized rose in side view. Draw a small freehand circle in the center of the page for the center of the rose. First, we'll sketch each part of the rose. Draw the opening of this shape. Next, draw a line that looks sort of like half of a curly s shape. With this how to draw a rose step by step tutorial makes. Easy rose drawing in top view. When drawing your rose, notice where the lines start and stop in relation to the other lines. 7.9m views 7 years ago. How to draw a rose (step by step) printable pdf (see bottom of lesson) in today’s post, we will learn. ️ supplies you might love (amazon affiliate links):. Easy rose drawing in top view. Follow the instructions below to create your own beautiful rose. We then add just three extra lines to create the illusion of a complexly folded rose bud flower. This will be the inner bud of the rose sketch. With this how to draw a rose step by step tutorial makes. Look at a rose or a photograph of one and find the simple shapes that make up the whole. Next, draw a line that looks sort of like half of a curly s shape. Stylized rose in side view. How to draw a rose (step by step) printable. Roses are beautiful, but they can be a little intimidating to draw. The rose will look more realistic if the spiral is not in the circle’s exact center. Web here is a true beginner’s step by step demonstration of how to draw roses easily! With just a few simple shapes and strokes, you will be drawing dozens of roses in no time. Web starting from the bottom of your basic shape, draw a couple of lines that will start to form your flower. To begin your rose, you will need paper and a pencil. Make sure to keep them spaced evenly apart and gradually taper off towards the ends. Rose flower in full bloom. Discover the complete process, as you draw petal after petal with graphite pencil and colored pencil. Add another irregular oval shape at a diagonal base of the above circle for the first petal. Begin the simple, quick rose outline by drawing a long, curved u shaped line. Then draw the form of your one chosen petal as seen in the example above. When drawing your rose, notice where the lines start and stop in relation to the other lines. Then let's get going and learn how to create a rose pencil drawing that's realistic. Next, draw a curvy y shaped line in the middle of the u. this outlines the edges of the rose's overlapping petals. Follow along to learn how to draw and color this super easy rose drawing tutorial step by step.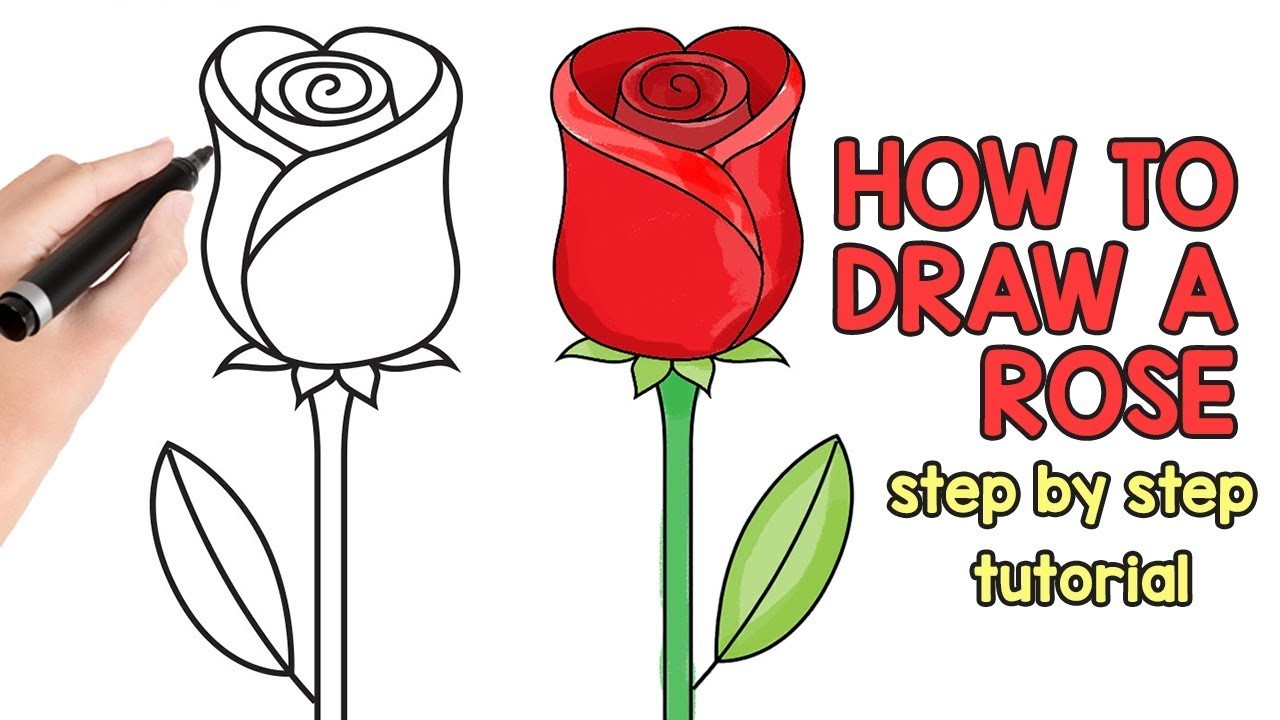
How to Draw a Rose step by step drawing tutorial YouTube
How To Draw A Rose Step By Step Guide

Rose Steps Roses drawing, Flower drawing, Roses drawing tutorial
Rose Drawing How To Draw A Rose Step By Step
How To Draw A Rose Easy StepbyStep Guide
How to Draw a Rose Easy Step by Step For Beginners and Kids Easy

Easy To Draw Rose Step By Step at Drawing Tutorials
How To Draw A Rose Step By Step For Kids Easy ClipArt Best

How to draw a rose stepbystep guide for beginners Flower drawing
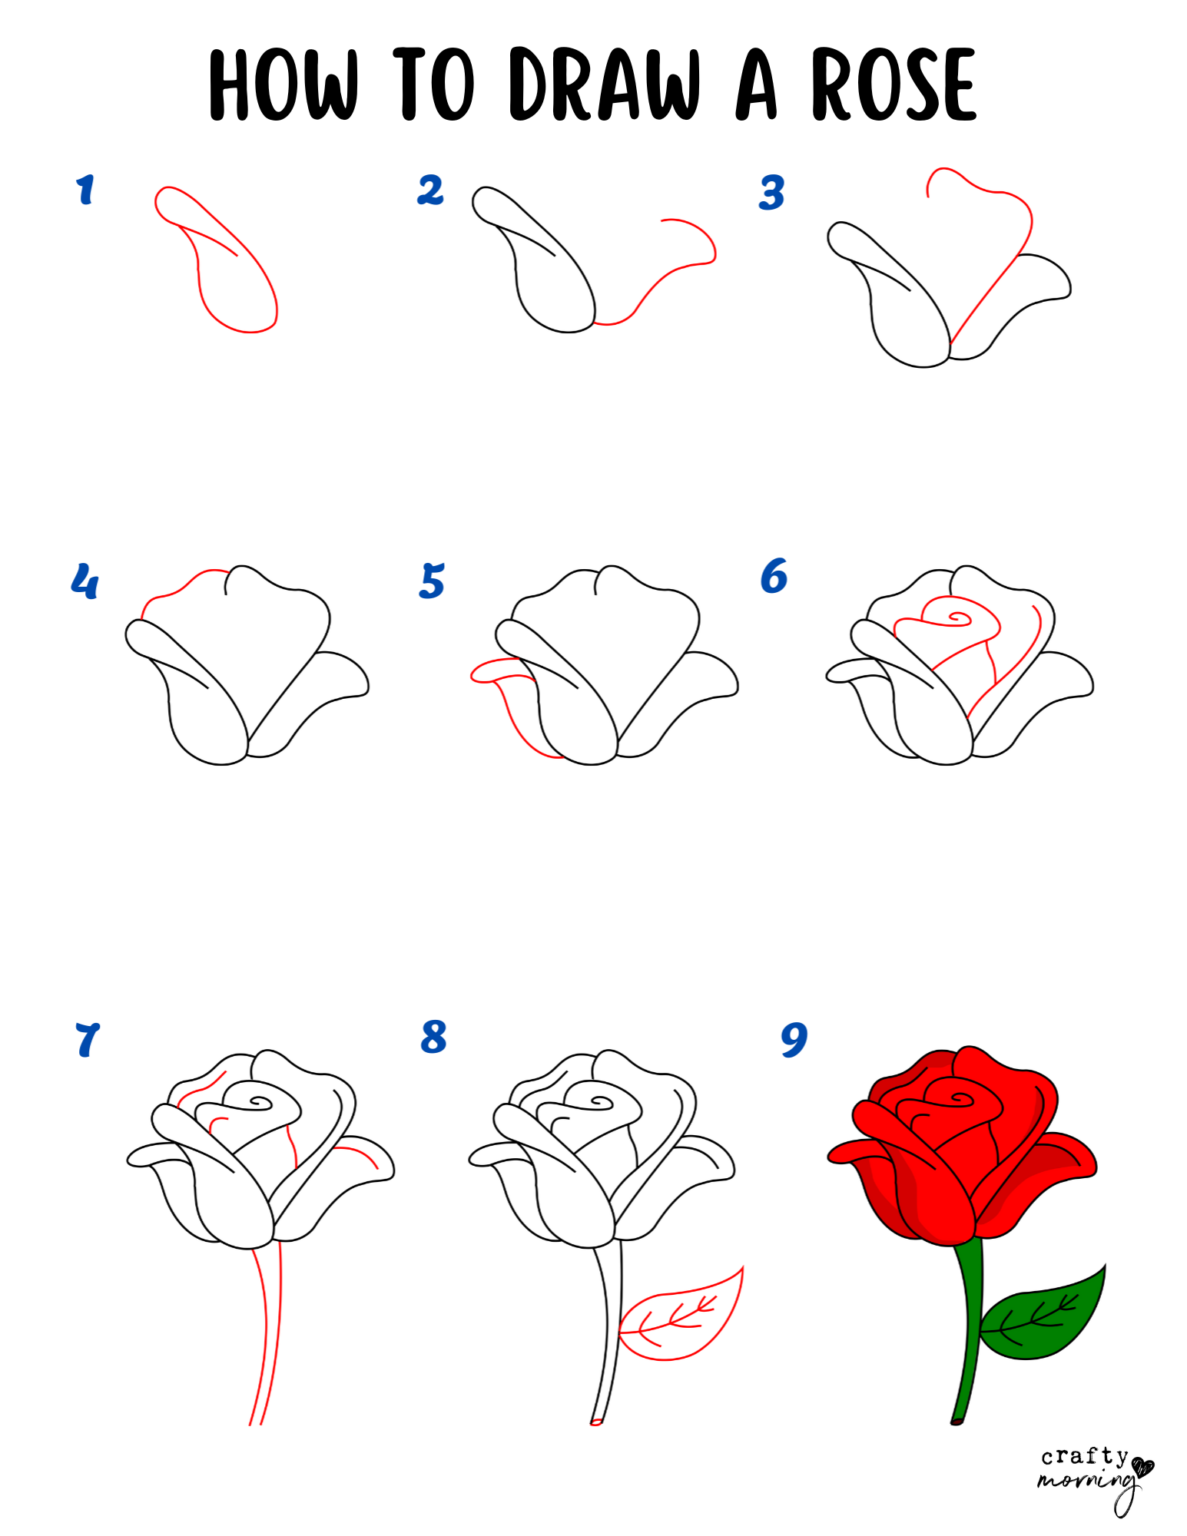
How to Draw a Rose Step by Step (Easy) Crafty Morning
This How To Draw A Rose Step By Step Tutorial Makes Drawing This Beautiful Flower Super Easy, Making It Perfect For Beginners As Well As Kids.
Using A Penciled Guideline Helps You Keep The Rose’s General Shape While Filling In Details.
Don’t Get Caught Up In How You Think The Rose Should Look On Your Paper.
The Anatomy Of The Rose.
Related Post: