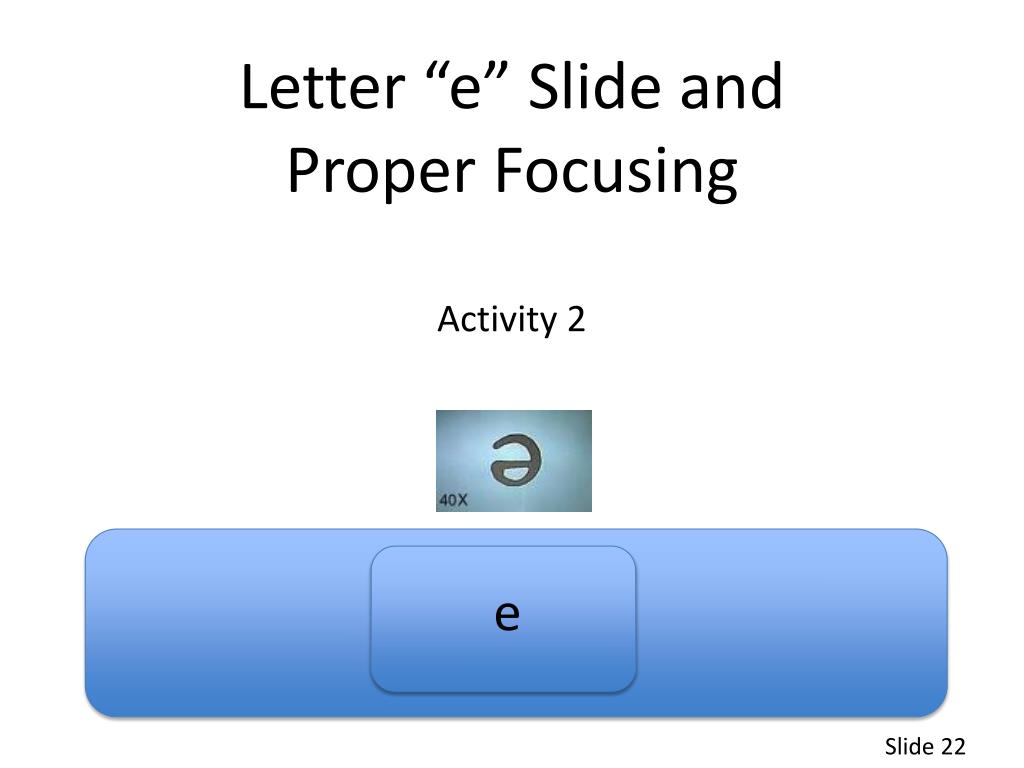
Draw The Letter E As It Appears On The Slide
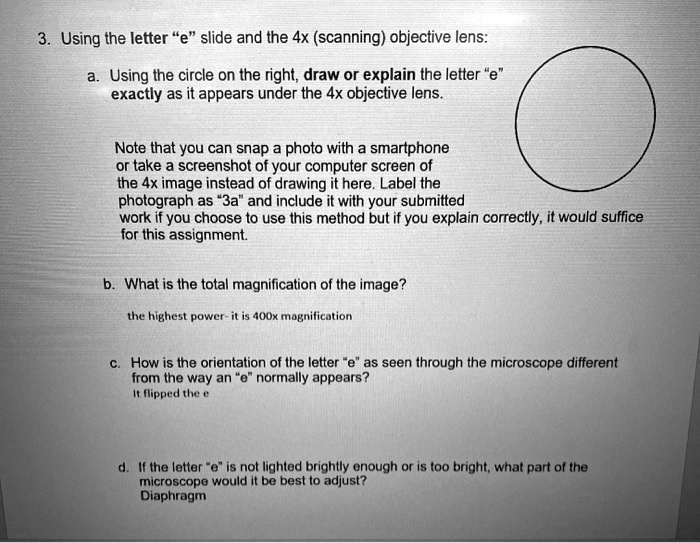
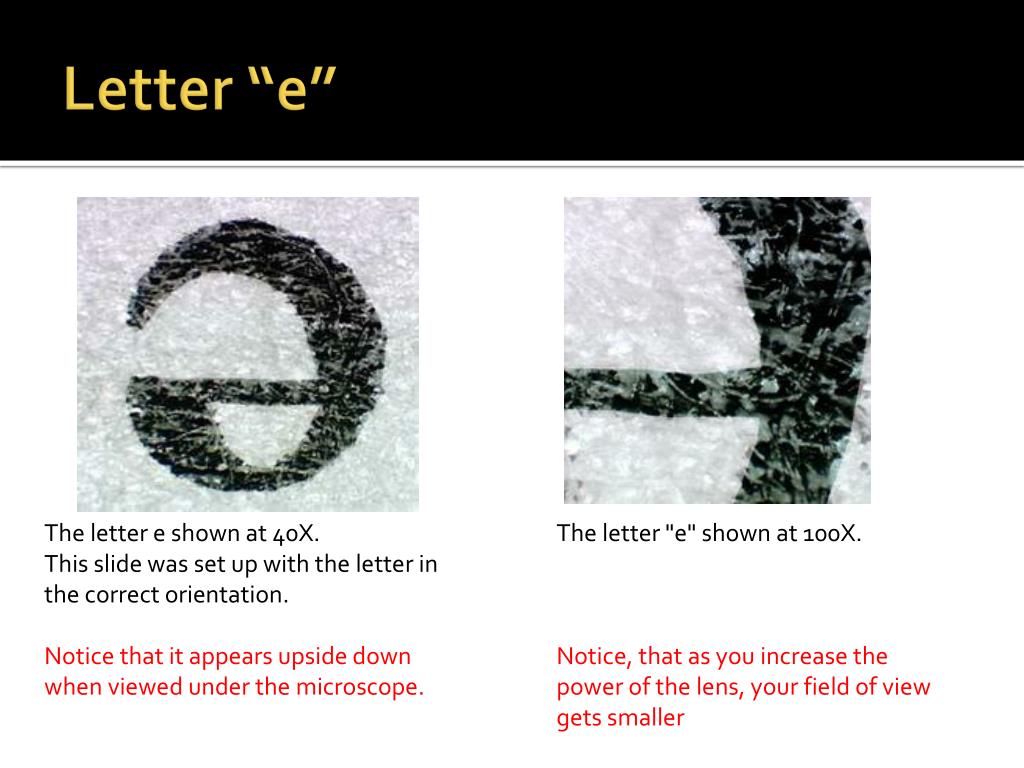
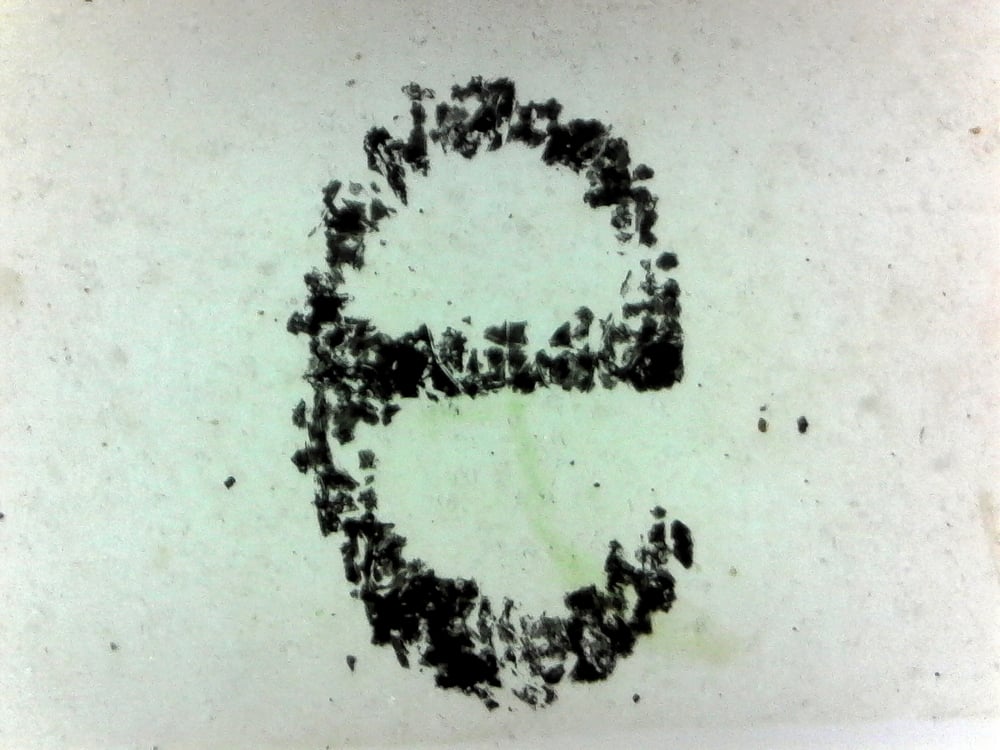
Draw The Letter E As It Appears On The Slide - Web to draw the letter 'e' as it appears on the slide with the unaided eye, observe the image formed by the lens without any magnification and draw the shape. The letter should be placed so that it can be read without turning the slide. View the letter under the. Note the change in orientation. Now find a part of the “e” that you would like to examine even more. The image of the e appears backward and upside down. See how you place the slide under the microscope and how it appears in the eyepiece. 4) plug in and replace cover. Web a cut out the letter “e” and place it on the slide face up. Web using the letter “e” slide and the 4x (scanning) objective lens: View the slide with your eyes, and then place it onto the microscope. Lower the stage using the coarse adjustment knob. Draw the letter e as it appears to the unaided eye. Web to draw the letter 'e' as it appears on the slide with the unaided eye, observe the image formed by the lens without any magnification and draw. Web describe the orientation of the letter e as it appears through the ocular lenses. View the slide with your eyes, and then place it onto the microscope. Place the slide of the letter “e” on the stage and stabilize it with the stage clips. Lower the stage using the coarse adjustment knob. See how you place the slide under. Web using the letter “e” slide and the 4x (scanning) objective lens: Be sure to note the orientation of the letter “e” as it appears to your naked eye. Normal view microscope view 2. Draw the letter e as it appears to the unaided eye. Draw the “e” in table 5.2 as you view it with your eyes (not through. Normal view microscope view 2. Draw the letter “e” as it appears when you look at the slide under the. Now center the slide of the letter “e” on the stage with the “e” in its normal. Use the focusing sequence to view the slide under low. Web 3) carry close to body. Web describe the orientation of the letter e as it appears through the ocular lenses. Web opposed to other samples under a microscope, the letter ‘e’ looks inverted and backward; See how you place the slide under the microscope and how it appears in the eyepiece. Place the slide of the letter “e” on the stage and stabilize it with. Web draw the letter “e” as it appears through the eyepiece. Notice that the left eyepiece can be rotated, but the ocular. Web draw the letter “e” as it appears when you look at the slide without the microscope. Place the letter on the drop of water using forceps. Web obtain a letter “e” slide available in the classroom. As you move the slide toward the right of. Place the slide of the letter “e” on the stage and stabilize it with the stage clips. Place the letter on the drop of water using forceps. Lower the stage using the coarse adjustment knob. Web draw the letter “e” as it appears when you look at the slide without the. 2) put the stage in lowest position. The letter should be placed so that it can be read without turning the slide. Use the focusing sequence to view the slide under low. Web obtain a letter “e” slide from your instructor. The image of the e appears backward and upside down. View the slide with your eyes, and then place it onto the microscope. Note the change in orientation. B add a drop of water to the slide. 2) put the stage in lowest position. Use the focusing sequence to view the slide under low. Web obtain a letter “e” slide available in the classroom. The image of the e appears backward and upside down. Web draw the letter “e” as it appears through the eyepiece. Web obtain a letter “e” slide from your instructor. B add a drop of water to the slide. Web draw the letter “e” as it appears when you look at the slide without the microscope. Web opposed to other samples under a microscope, the letter ‘e’ looks inverted and backward; Place the letter “e” slide onto the mechanical stage. Web describe the orientation of the letter e as it appears through the ocular lenses. Web using the letter “e” slide and the 4x (scanning) objective lens: The image of the e appears backward and upside down. Place the slide of the letter “e” on the stage and stabilize it with the stage clips. Draw the letter e as it appears to the unaided eye. View the letter under the. Web to draw the letter 'e' as it appears on the slide with the unaided eye, observe the image formed by the lens without any magnification and draw the shape. Web obtain a letter “e” slide available in the classroom. Note the position of the letter “e” on the slide (using your eyes only). As you move the slide toward the right of. Web draw the “e” as it appears through the microscope under low power in the circle on the next page. The letter should be placed so that it can be read without turning the slide. Now center the slide of the letter “e” on the stage with the “e” in its normal.
The Famous Microscope Letter E Slide YouTube
PPT Lab 1 PowerPoint Presentation, free download ID2063291
SOLVED Using the letter "e" slide and the 4x (scanning) objective lens
PPT Microscope Mania PowerPoint Presentation, free download ID2684454
Google Slides Text Basics
Letter "E" Prepared Microscope Slide
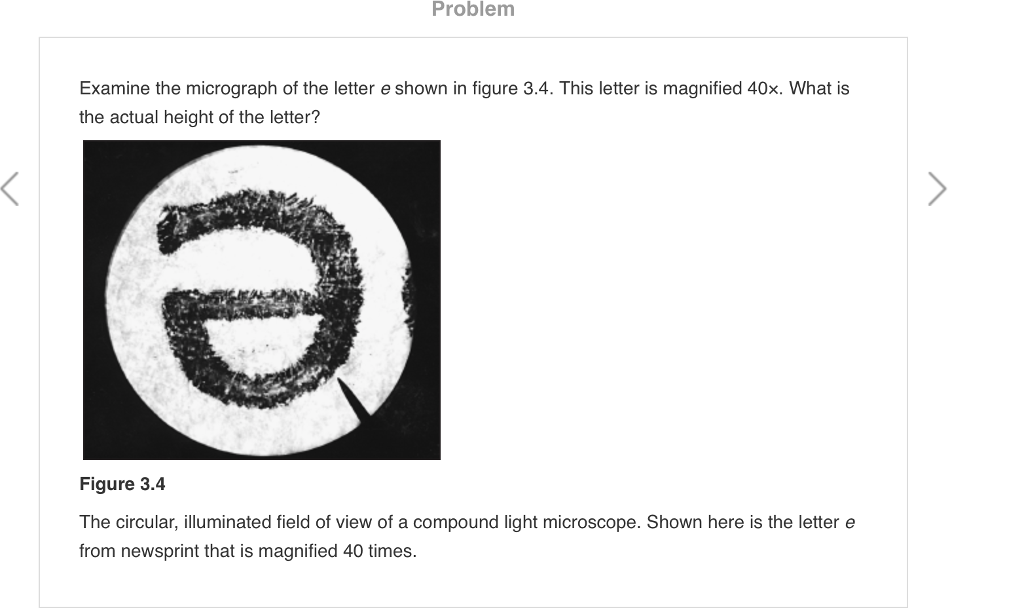
Solved Examine the micrograph of the letter e shown in
Microscope Lab Letter E

Alphabet Slide & Learn Flash Cards TCR6553 Teacher Created Resources
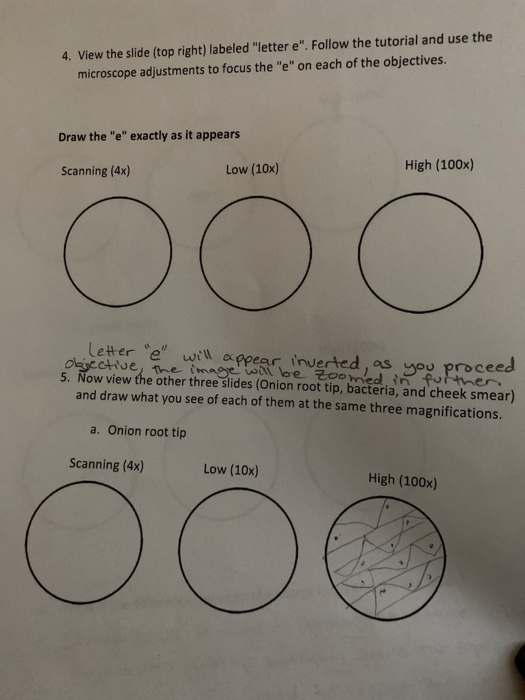
Solved 4. View the slide (top right) labeled "letter e".
Note The Change In Orientation.
Now Find A Part Of The “E” That You Would Like To Examine Even More.
Draw The Letter “E” As It Appears When You Look At The Slide Under The.
Use The Focusing Sequence To View The Slide Under Low.
Related Post: